October 2023
The best berries to plant now for a sweet spring crop
by Cassey Anderson, CSU Horticulture Specialist in Adams County
Small Fruits can be a reliable way to get fruits in your yard! If your goal is to have more food from your landscape small fruits are a great, aesthetic and more consistent source of fruits than many tree fruits. This is at least true in many parts of Colorado where erratic freezes can sound the death knell of a productive fruit season. Since small fruits bloom and begin to set fruit long after the risk of frost is past, they are not susceptible to unpredictable spring weather. Plus, you’re more likely to have good pollination as other plants have developed and can act as beacons for your small fruit pollination!
Unlike a vegetable garden which is primarily focused on annuals, a small fruit garden is managed over years, you may need to take mulching, pruning, trellising and more into consideration.
Tried and True
Strawberry
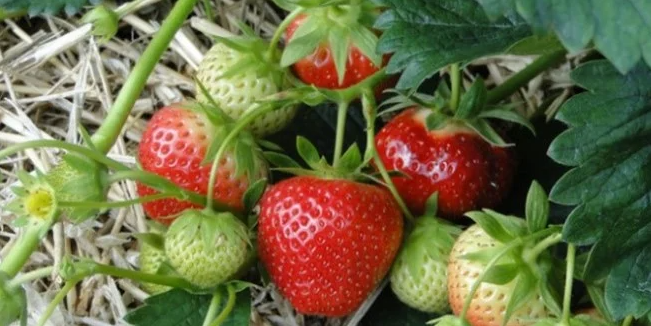
A perennial groundcover that spreads via stolon (adapted roots), strawberries can be challenging to establish but are very tough once established. If your soil is very heavy clay (i.e. slow drainage) you may want to build into a raised bed. Strawberries are most productive in their first 3-5 years, after that rouge them out and replace with “daughters” that have grown out from the original plant.
There are three main types of strawberries: June bearing, ever bearing, and day neutral.
• June Bearing cultivars have one large crop in early summer, larger fruit, and higher yields. Popular for freezing and jams with flavorful, aromatic berries.
• Everbearing have two crops, one in early summer and a second crop in the fall, tend to be more reliable than June bearing cultivars in cold climates, berries are smaller.
• Day Neutral flowers most of the summer and fall in cycles lasting around six weeks each, blossoming will slow or stop during hot weather, fruit is typically small, need consistent, light fertilization and regular removal of runners.
Mulching strawberries is very important. A straw or grass mulch will reduce soil temperatures and help to retain moisture. Plastic mulch can also be an option if weed pressures are high, or if you need to warm the soil. Strawberries will need about 1 pound of nitrogen per 1000 square feet each season, applied lightly and regularly through the season, or use a slow-release fertilizer.
Harvest regularly, at least every 2-3 days to reduce losses from pests and wildlife. If you expect to wait more than a few days (somehow) before eating or preserving, retain the “cap” on the fruit, if eating quickly you can leave the caps with the plant.
Winter care – in cold climates you want to ensure strawberries do not get frosted at the root level. Mulch deeply (you can almost cover the plants in dry areas) with a weed-free straw. If snow coverage is expected for most of the season you can reduce the mulch. Leave the mulch until you start to see growth the following spring.
Raspberry/Blackberry
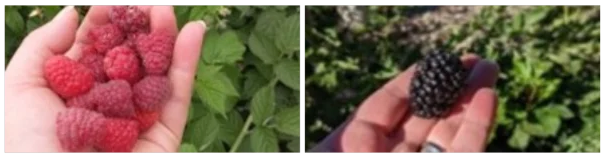
There are two main types of raspberry and blackberry canes: primocane and floricane. The easiest, although slightly less productive one is the floricane type, or fall-bearing. These types produce fruit on the first-year canes but not until late summer into fall. Primocane types produce fruit earlier in the season but on second-year canes. This means you must keep canes for two years before seeing fruit. In areas with dry or windy winters primocane types can be less productive. In winter, once you’ve had a deep freeze (below 28 F) you can prune ALL canes down for primocane types, and all second-year canes for the floricane type.
Canes can benefit from mulching in to preserve moisture, regular irrigation during dry spells, and access to abundant pollinators to ensure good fruit pollination. Typically, they will need at least 1” of moisture each week, more if it gets hot and dry. It’s also good to give them some fertilizer, around 1-1.5 pounds of nitrogen per 1,000 square feet, this can be applied with a slow-release fertilizer early in the season as canes are beginning to develop or can be spread over the season until flowers begin to develop.
Trellising – canes will likely need support unless you want to harvest by crawling on the ground. Trellis systems can be complex or as simple as a t-post with wire wrapped around it to provide support as the canes grow.
Pests – one of the big pests in cane crops is the spotted wing drosophila, a small fly that lays its eggs to develop in the fruit. Management can be as simple as daily picking but can also include trapping and scouting.
Grapes
Grapes can be a good ornamental feature of your landscape and supplement to your pantry (or for donation!). To ensure success there are so key points to follow. Grapes do not tolerate shade well, so they need an area with full sun. If you plan to have mor than one plant, you’ll need to space them 6-8 feet apart. Grapes are best planted in the spring, there is insufficient time in the fall to allow them to establish before the cold of winter.
Trellising – Grapes cannot grow without a strong trellis system. You can go basic with posts and wire (12 gauge or heaver), use a strong fence, or even grow on a pergola. If you plan to grow on a pergola, one plant is likely adequate.
Pruning – Grapes require thorough pruning to be the most productive. There are many different pruning strategies, but that’s beyond the scope of what we can get into here today. A grape vine, left unpruned, will still produce but it may not produce as well as one that has been carefully managed, or may produce in less convenient parts of the plant. Remember that dormant buds on last year’s canes produce new canes that grow the grape cluster, so you need some established cane to produce new growth.
Blueberries
What about blueberries? I’m not going to get into blueberries now as they are out of my wheelhouse since they do not tolerate the alkaline soils of the west. However, if you’re fortunate enough to live in an area with acidic soils (a pH of 6 or lower) you can look into blueberries! Contact your local Extension office for more info!
Less common, but awesome
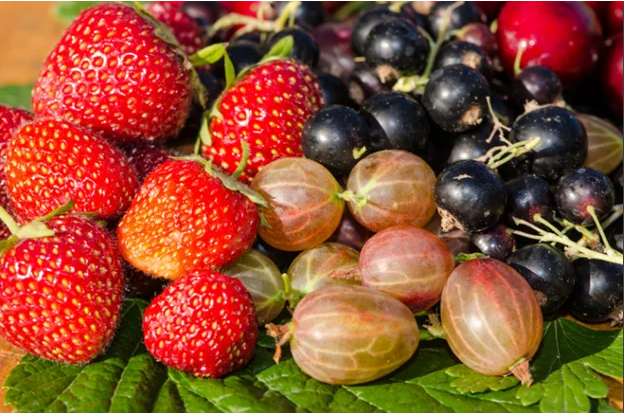
Gooseberry, Currant, Jostaberry
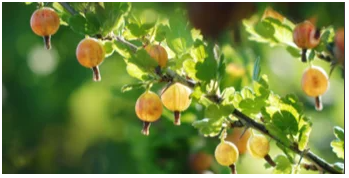
Dual purpose: ornamental and food! These can be very productive when planted in a mostly sunny (can tolerate some shade), well-drained soils with good organic matter or supplemental nutrition. Use mulch to keep soils temperatures cool.
Gooseberries and currants can be used for pies, jams, or other preserves, they tend to be tart. The Jostaberry is a hybrid between gooseberry and black currants.
These shrubs are most productive on their second and third year wood, so prune out canes after the third season. Ideally a bush should have 1/3 new canes, 1/3 two-year old canes, 1/3 three-year old canes.
Elderberry
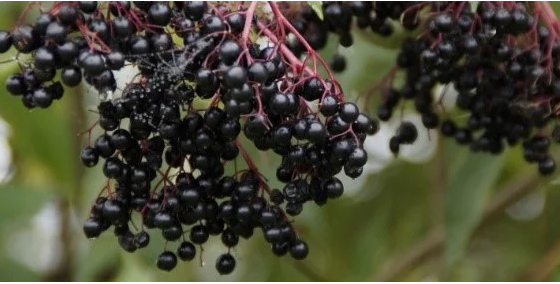
A much larger shrub, can almost be a tree in size in some situations, can be in partial shade as well. Be sure to purchase varieties grown for their fruit productivity. Berries should not be picked until fully ripe, sort out any that have not ripened completely. Do note, these cannot be canned safely as they are so acidic that food-safe preservation can be challenging. Can be pruned out by removing 1/3 of the largest canes every few years to allow continued new growth.
Serviceberry
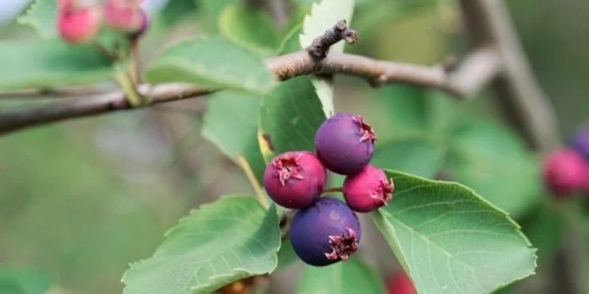
Also called saskatoon berry or Juneberry is another in the shrub/tree category serviceberry is one that I would love to see in more landscapes as it has aesthetic characteristics all year round. 12-20 feet tall depending on variety it has beautiful spring blooms, summer fruit, and many have orange or red fall color, so this can check a lot of boxes for smaller landscapes. For best productivity it does need full sun and to avoid wet soils.
There are many more small fruit varieties that are even more niche, but these are typically easy to find and can reward you with years of tasty harvests for your home and for donation!
As always, reach out to your local Extension office with additional questions and for further resources. Happy Gardening!
April 2023
Eight easy plants to grow for donation
by Cassey Anderson, CSU Horticulture Specialist in Adams County
(Hint: they’re not tomatoes)
It’s finally time to get some plants in the ground for many of us! Now I know that tomatoes are an often requested food donation item, and a favorite of gardeners everywhere, but let’s be honest, they’re princesses and can be difficult to have success with; they can succumb to a myriad of diseases, they can be finicky about cold, fuss about too much heat, too little fertilizer, too much fertilizer, the list goes on. If you’re a first time gardener planning to donate, or if you have had garden struggles in the past few years, try these eight easy plants to grow. If you grow carefully, you can have ample harvests both for your own household, and enough left over to donate.
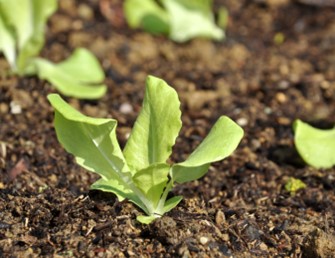
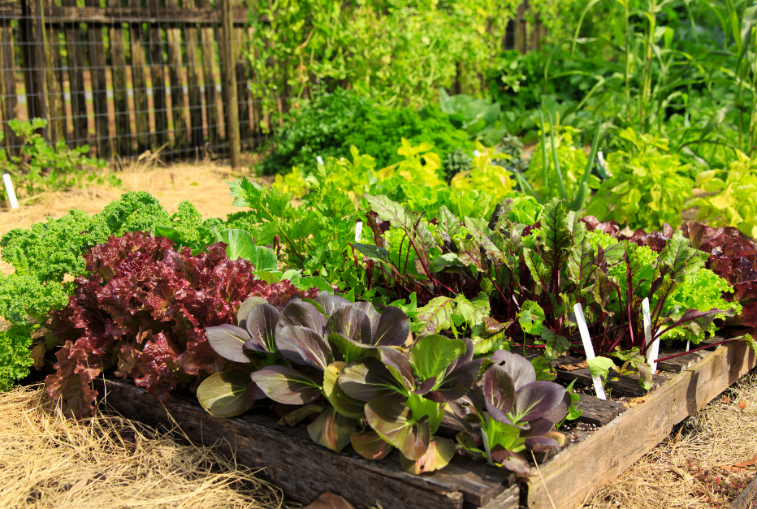
Lettuce (cool season)
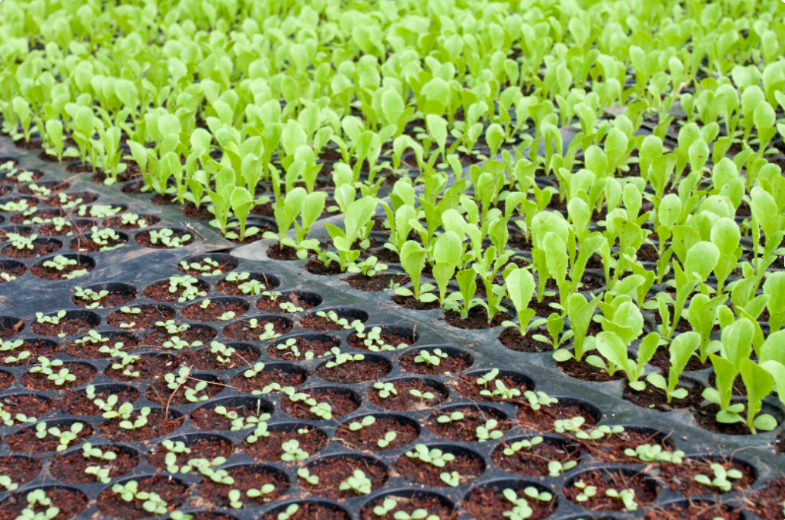
Lettuce is a great starter vegetable crop because the seeds germinate very easily provided they get some moisture, some warmth, and some light. Sow seeds shallow (just a skiff of soil over the top) either indoors or out. Harvest can begin as soon as the seedlings pop up if you’re looking for microgreens, as true leaves form for baby greens, or you can thin the crop and harvest heads after 3-4 weeks. Lettuce does need rich soil that stays moist but drains well and benefits from regular feeds or rich soil.
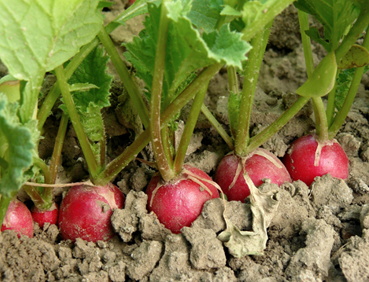
Radish (cool season)
Radish is probably the best starter crop for vegetable production. It has large, easily manageable seeds that germinate readily and easily, and you can get an edible crop within just a matter of weeks. Be sure to grow in a rich soil or fertilize regularly and grow with ample water to reduce hot and spiky flavors. Radish is a great candidate for succession sowing, which means you plant approximately the amount you’d like to harvest in a week, and then plant another round in 1-3 weeks.
Note: some people do like to plant radish and carrot together. This can help carrots break through the crust of the soil layer (an issue which makes carrots a slightly more challenging crop). Radishes will be ready for harvest long before the carrots, so they don’t compete.
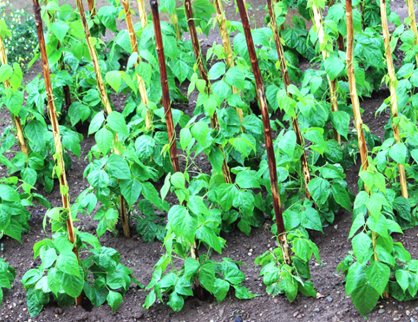
Green Beans pole vs. bush (warm season)
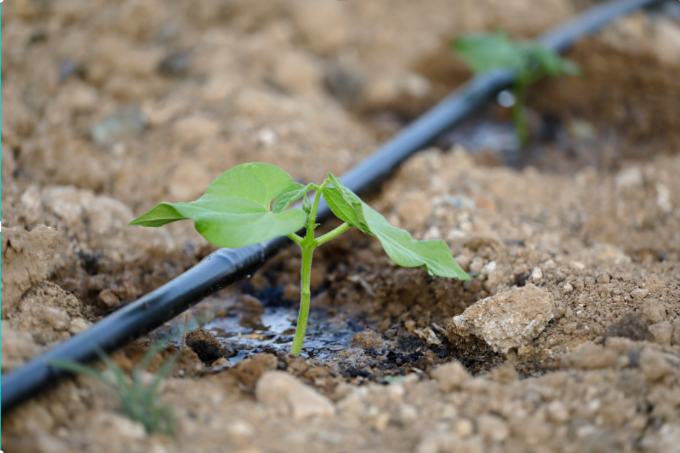
Green beans are a satisfying vegetable garden crop. The seeds are large and germinate readily in warmer soils (50-60 F), often around mid-to late-May. There are two types of beans to look out for and you can select them according to your harvesting preferences. Bush beans do not require support and can be easier on the front end to grow. They will produce 2-3 main crops of beans to harvest and then are done for the season. You can succession sow bush beans to ensure consistent harvesting through the season. Pole beans will require a vertical trellis or support system (see picture) to ensure continued production and they will yield continuously through the growing season if they remain picked. If too many beans begin to mature the plant will slow down production. Beans do not need much supplemental fertilizer as they are able to fix Nitrogen from the air for their own use. This Nitrogen will be released back into the soil in the following season for a new crop to use.
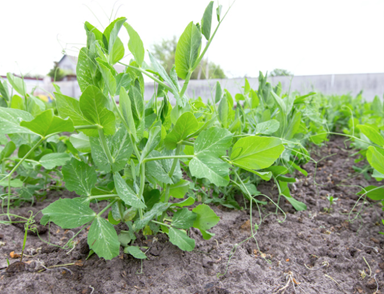
Peas (cool season)
Peas are a satisfying early season crop. These can be planted as soon as the soil can be worked in the spring, and the earlier you plant the better the harvest you’re likely to get. For example, a pea planted April 1st will produce more than a pea planted May 1st. Most peas are bush type and self-supporting but read your label carefully to determine if it is a pole type that needs support structures. Peas are also nitrogen fixers and able to provide their own nutrition. If you have never planted peas in your garden before it could be worth using a pea inoculant called Rhizobia, which can be purchased online or at local garden centers. Inoculate your peas by mixing the seeds with the pea inoculant in the seed packet and shake prior to planting. A second crop of peas can be planted easily in July for a fall harvest.
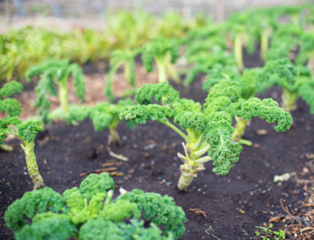
Kale (cool season)
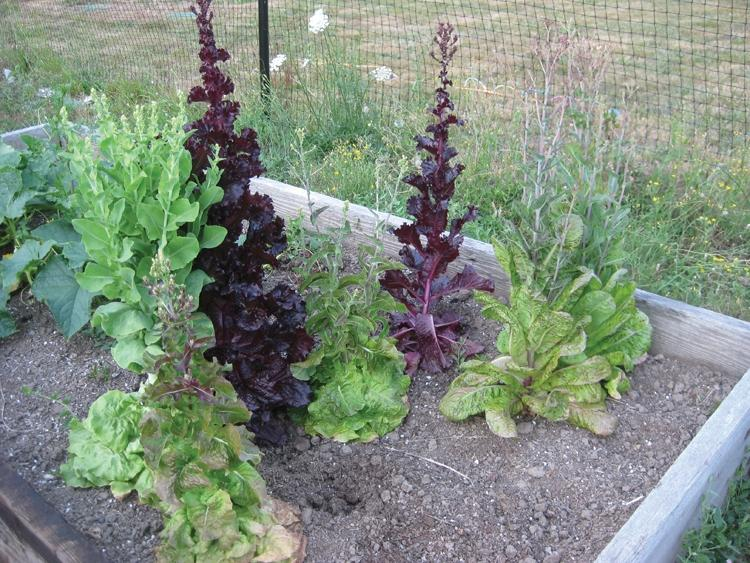
Kale is another leafy green that is easy to grow and such a great crop you can eat at any maturity size. If you plan to grow to maturity, it’s a good idea to space the seeds sufficiently apart, up to 24” for larger types. Kale can be harvested several times if you only take the mature outer leaves (see picture example). Kale is a cool season plant so grow in spring and plant again in July or August for a fall harvest. Kale will benefit from cool and even cold weather, cold snaps down to 28 degrees F can stimulate a sweeter taste.
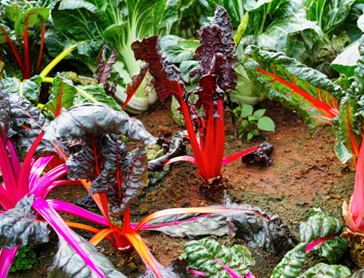
Swiss Chard (cool into warm season)
Chard is a great, and easy way to add color into your leafy green offerings. Mature plants can be large so space appropriately (up to 12-18”). You can harvest chard like kale, leaving the smaller, inner leaves to grow more. Swiss chard is related to beets, so every part is edible. Swiss chard may be a good alternative to spinach which can be a little more finicky to grow in the vegetable garden. Chard can be direct sown once the risk of hard frost has passed but can also be transplanted if you want a jump on the season.
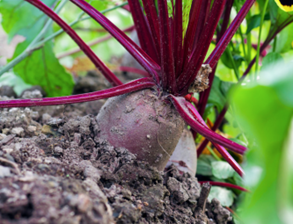
Beet (cool into warm season)
Beets are a great way to get those pounds in for donation. They germinate easily and you get a multi-use product as both the root and the leaves are edible. Beet seeds are compound, so spacing carefully will not give you ideal spacing as there are multiple seeds in a cluster. Instead, plant with care, and a few weeks after germination thin to about 3” per plant. Save the seedlings you thinned out and rinse for an addition to a tasty stir fry. For friends who don’t like the “earthy” flavor of beets try a variety like Avalanche, all the sweet with less of the earth. Beets will need to be fertilized a couple of times in the season and need regular watering to prevent splitting. Harvest at about 2.5-3” in diameter, as once they get larger, they can get woody.
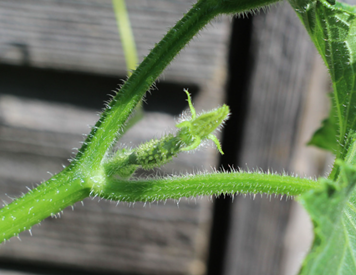
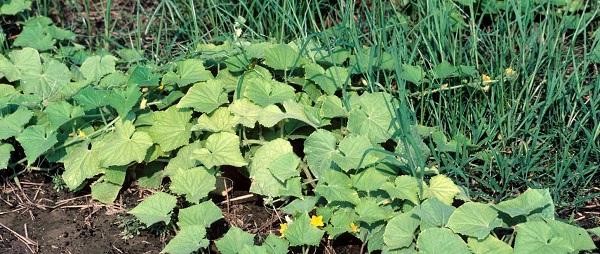
Cucumber (warm season)
Cucumbers grow readily and easily either by seed or by purchased seedling. If you do purchase a seedling, try to find one that is small with only a few “true” leaves, or you can plant once soil temperatures reach about 60 degrees and all risk of frost has passed. If planting by seed, it can be wise to plant 2-3 seeds in a planting hole and thin out to one plant once they have germinated. Cucumbers have both male and female flowers, so if you’re getting fruit in the first few weeks of flowering, check to see if you have mini “cucumbers” (see picture for a great example prior to flower maturity) at the base of the flower, or just a stem. Plants typically have male flowers before they have female flowers.
Now this list is by no means exhaustive, and with care and consideration tomatoes, peppers, potatoes, eggplant, squash etc. can be excellent and highly recommended additions to your vegetable garden, they just aren’t as simple to grow as those listed above.
As always, reach out to your local Extension office with additional questions and for further resources. Happy Gardening!
Gardening in Colorado? Check out Grow & Give www.growandgivecolorado.org and in particular our Colorado Vegetable Guide https://growgive.extension.colostate.edu/colorado-vegetable-guide/ for more crop information on all of the above plants.
March 2023
Soil Made Simple
by Cassey Anderson, CSU Horticulture Specialist in Adams County
Preparing your garden beds for spring
It’s March, and the beginning of the growing season is just around the corner. Depending where you are you may be thinking about starting seeds, planning what to do with the far-too-many seeds you purchased, but if you’re itching to get in the garden you’ll want to start with your soil.
Existing garden beds, growing well
If your vegetable beds are well established and growing productively each year, you’re probably good with how you’ve been managing things. A soil test after amending new material is always a good idea of give you an idea of your baseline, but if it’s not broken, no need to fix right?
It may be necessary to amend with compost every few years to keep your organic material (OM) in the ideal 4-5% range, and it’s always a good idea to test your soil to see what your new baseline is after amendment events.
Existing garden beds, not doing so well
I know I raise this alarm frequently, but if your garden beds aren’t growing so well it is time for a soil test. Take samples 6-8” deep throughout all of the beds that you manage in the same way. Soil tests generally run from $20-40 depending on how much information you want. You can contact your local Extension office for a recommended list of soil testing facilities.
Soil tests will typically provide you some baseline information. It’s always a good idea to learn your soil texture, % organic material, and to get at least a snapshot idea of the nutrient levels in your soil.
Nitrogen is one of the most limiting nutrients as it can move through the soil with water. There are two ways to get more nitrogen in your soil. The first is to incorporate compost into the top 8-12” of your garden soil, to the point of having 4-5% organic material. The second option, particularly if your other nutrients such as phosphorous and potassium are high, or your OM levels are too high, is to amend with organic or synthetic nitrogen. Keep in mind, your plants don’t have a preference where they get their nitrogen from, so it’s up to you.
Phosphorous and potassium are less likely to be limited and are found abundantly in soils that are amended with compost, but it’s a good idea to track that your numbers aren’t going above or below recommended values.
You may also see results such as EC (electrical conductivity) which tells you how salty your soil is, or CEC – the cation exchange capacity which measures the ability of the soil to hold nutrients, in particular molecules of a particular charge (positive such as Calcium, Magnesium, and Potassium). This gives you a baseline idea of your soil properties, i.e. is it sandy or clay.
For further soil test interpretation reach out to your local Extension office, there can be a lot to unpack!
New Beds
Getting into an in-ground or raised bed for the first time? Expanding? Ideally, it’s best to do the above-mentioned soil test first and then begin your garden preparation. I won’t get into the nitty gritty of site planning or establishing good sun for your future vegetables, but ensure you have a site with good access to water and sun.
To prepare a new area you can loosen the soil by double digging, this is a task often best performed by a young family member who has a strong back and needs some pocket money. Double digging is when you dig 8-12” out of the ground, then dig an additional 8-12” deep. If your garden beds are in-ground and not raised it is important at this point to establish good pathways, so you don’t get tempted to walk on your newly dug growing space. This can cause compaction which can reduce water movement and plant growth.
If you’re building raised beds you may not need to double dig, but it can be beneficial to mix your native soil with soil you bring in to fill your beds. This prevents issues of water movement between the two layers. It is not recommended to put barriers in between your raised beds and the garden soil unless you have particular circumstances such as contaminated soil, particular pest issues, or mobility issues that mean you’re raising your garden bed at least 18”.
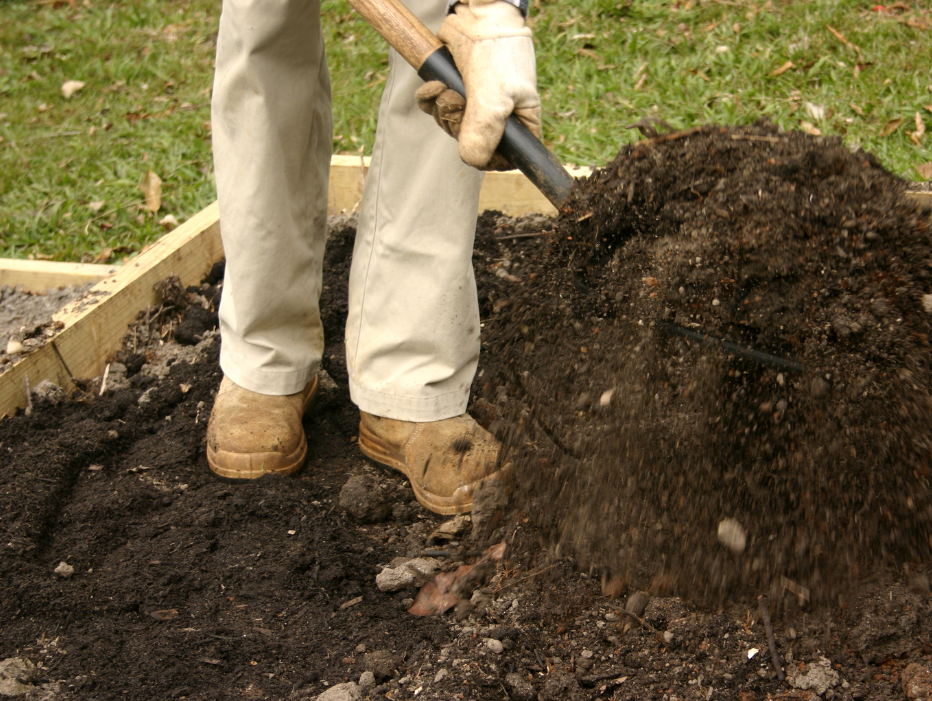
Amend your new garden beds with 1-2” of compost, dug at least 8-12” down. Organic material can improve the nutrient holding capacity of sandy soils, and improve the drainage of clay soils (amongst many other things). Over time a garden soil that has 4-5% organic material in it can release enough nitrogen to allow a vegetable garden to grow healthily.
Amendments
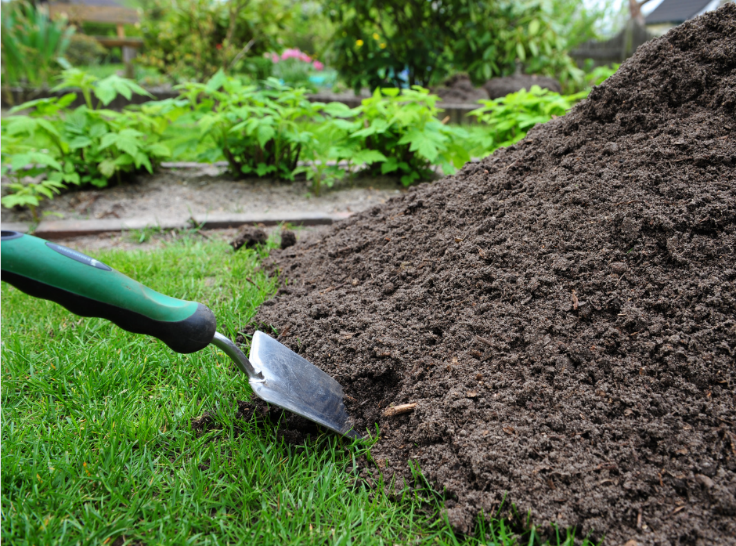
The gold standard for vegetable garden bed amendments is compost and there are generally two types: Plant based and animal-based. Provided you follow certain precautions, it can be perfectly fine to use either plant-based or animal-based compost in your vegetable gardens. Do be aware, that you cannot use as much animal-based compost due to higher salt content. Salts are not just sodium chloride, or table salt, but other nutrients, in high quantities as well such as magnesium, calcium chloride etc. Too many salts in a soil can cause toxicity to plants. Follow the amendment guide in this CSU Extension Colorado Master Gardener Garden Note for specifics: https://cmg.extension.colostate.edu/Gardennotes/241.pdf see page 3.
Amending can be done by hand with a garden fork or shovel, you can use a broadfork, or you can use a rototiller. The rototiller is least recommended because it can destroy soil tilth that you have developed. For first time gardens rototilling is fine, it’s just not recommended to rototill frequently.
Container gardens
If you’re a container gardener, it’s recommended to use new potting soil for your vegetable plants each year. You can use last year’s soil for ornamental containers or incorporate into other beds/use as a mulch in your garden if you have one (or find a gardener who wants a donation of material!). Using new media (potting soil) ensures that you eliminate any disease remnants that may have persisted in your containers from the previous season.
As always, reach out to your local Extension office with additional questions and for further resources. Happy Gardening!
February 2023
Tool Care 101
by Cassey Anderson, CSU Horticulture Specialist in Adams County
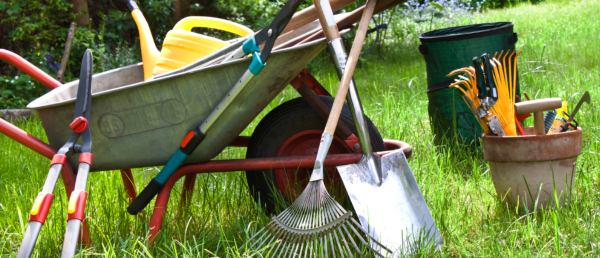
Perhaps you’ve put in your seed orders, you’ve planned where you want said seeds to go in your garden/landscape/patio and you’re wondering what you can do next. It’s too early to start almost any vegetable crops in February, so your gardening energies are looking for an outlet. Not to worry! This is a great time of year to work on getting your garden tools ready for the season.
Now, if you’re anything like me, you finished up the fall season tired and fed up with spending time in the garden, so it’s possible that you tossed your tools: hori hori, shovel, garden fork, pruners, loppers etc. into a pile in your shed/garage/storage area and haven’t dared peek inside the area since. Perhaps that’s just my habit and you’ve already cleaned and prepared your tools, in which case I have fewer garden suggestions for keeping you active this time of year. Perhaps you can peruse a few more seed catalogs, you can’t have too many seeds right? (Here’s some great info from Fresh Food Connect about choosing what to plant in a Giving Garden!)
It’s a DIRT-y job
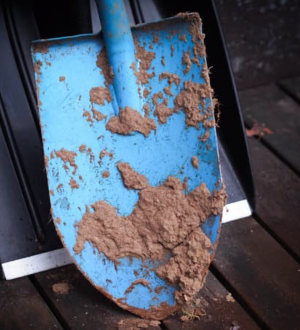
If you are like me, now is the time to brave your storage area and pull out your tools. If there are still clumps of dirt and debris from last year, your first course of action is to clean that off. Your soil type can determine if this is a pleasant task, or f if you may have to put some elbow grease in (clay soils are prone to becoming sticky and persistent). For some, a coarse brush is all you’ll need to brush off those end-of-season bits. For more stubborn clumps, you may need a wire brush, or even a wash with warm and soapy water. If using water, be sure to dry the metal parts of your tools completely before moving on.
Get the EDGE on your growing season
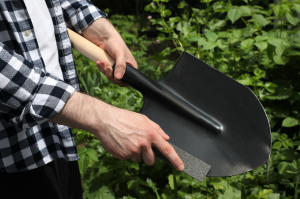
Did you know that you can make your tools work better by honing a bit of an edge on them? New shovels from nurseries or big box stores are great because they are strong and new, but they tend to have a rather blunt edge which can make digging frustrating. Most tools benefit from about a 45-degree angle. You can accomplish this with hand sharpening files or mechanical sharpeners. Store your newly cleaned and sharpened tools so their edges do not touch the ground, this will preserve the edge for a long, successful gardening season.
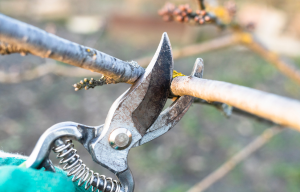
If your pruning tools aren’t working quite as they used to, it may be time to hone or sharpen these edges too. If you’ve got pruners that you can disassemble, it’s best to take them apart for this step, as you’ll have more success sharpening the pruning blade. Do note, if you’re working with bypass pruners (the blades slide past each other) you typically only need to sharpen one side. If you’ve got gardening shears or scissors you may need to sharpen both blades. You can buy all-in-one tools that you run along the blade but for the best sharpening it’s good to use a sharpening file.
With all your tools it’s a great idea to oil the blades after cleaning and sharpening, wipe off any excess oil with a clean rag.
ORGANIZE!
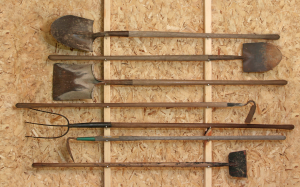
Finally, a good organization system can keep your tools clean and ready. This can be as simple as a bucket that they all rest in, or as intricate as a wall with a spot to hang every single tool. It all depends on your space, but it will be easier to keep tools neat and organized when they have a designated storage area.
BONUS FUN – Dig deep
Still looking for more ways to prepare for spring? If you haven’t had the time in the last year and you have some of your vegetable garden beds that are exposed this time of year, take a soil sample and send it to a soil testing lab to see where you stand with your nutrients. It’s never a good idea to amend with fertilizer/compost etc. if you don’t know your soil condition.
Keeping your tools clean and organized will help them last longer, and is a great way to make your gardening season more enjoyable. With just a few more weeks of winter to go, now’s the perfect time to get started!
Enjoy this last month before spring! As always, contact your local county Extension office if you have further questions.
January 2023
Key factors to consider now
by Cassey Anderson, CSU Horticulture Specialist in Adams County
Happy New Year and welcome to 2023! There is a lot that can go into planning a vegetable garden, whether you’re particularly “Type A,” or if you’re the type who can set some general guidelines and flex through the season as needed. However, there are some important considerations to make for even the most laissez-faire gardener. We’ll go into crop selection, how you want to get started, and considerations for the general maintenance of the garden throughout the growing season.

What do you want to grow? It can be tricky sometimes to know what you want to grow if you’re starting out, but there are always some good standbys particularly when you’re growing with the intent to donate in mind. The top 5 requested fresh foods at Hunger Relief Organizations are:
1. Tomatoes
2. Peppers
3. Onions
4. Lettuce
5. Carrots
(Also check out this Fresh Food Connect article for more details: “What type of produce should I grow and donate?”)
Of course, this does not mean that your greens, your cucumbers, your beans are unwelcome, donate away (all of those are in the top 15!). If you’re in doubt reach out to your local HRO and check in about your specialty crop or variety. The best thing to grow is the thing that you know you will eat and donate, so it’s better to focus your attention on a few great crops than to try to grow a huge variety.
Are you buying seedlings, or starting from seed?

The easiest way to get a garden started is to head to the garden center a few weeks before the last frost date, or around the last frost date and pick up ready grown seedlings. This approach can get expensive, and you’re more limited to the varieties that the nursery sells. If variety is important to you, or if you enjoy the thrill of seeing a dull brown seed turn into a vibrant green seedling (I’m afraid I’m letting my bias show here!) then seed starting may be your best choice. See more on seed starting at www.growandgive.org.
Be aware, however, not to start your seeds too early or you may end up with very large transplants that will struggle to establish once moved over. Tomatoes should have 5-7 leaves and have a stem about the size of a pencil (about 8-10 weeks before last risk of frost is over). The cucurbits (melon, cucumber, squash) need less time, start them about 4 weeks early and transplant as the first true set of leaves have emerged.
How much space do you have? Are you adding space?
I know it is far too easy to over purchase and over allocate your space. Vegetable gardens do best with good air flow. So, while it’s tempting to pack in the plants to increase your productivity it can have the opposite effect. If your garden has been the same for many years take the lessons from last season and apply them to this season. Buy/grow what you need and donate excess seedlings to someone who has more space or doesn’t start their own seedlings.
If you’re adding garden bed space, you can plan extra plants accordingly but do be sure to check on mature spacing needs for your specific crops. A winter squash plant may need over 6’ of space for one plant! Remember, also, that with almost every vegetable crop you can go vertical which gives even small spaces new opportunities.
How do you care for your landscape?
-3kuzk.png)
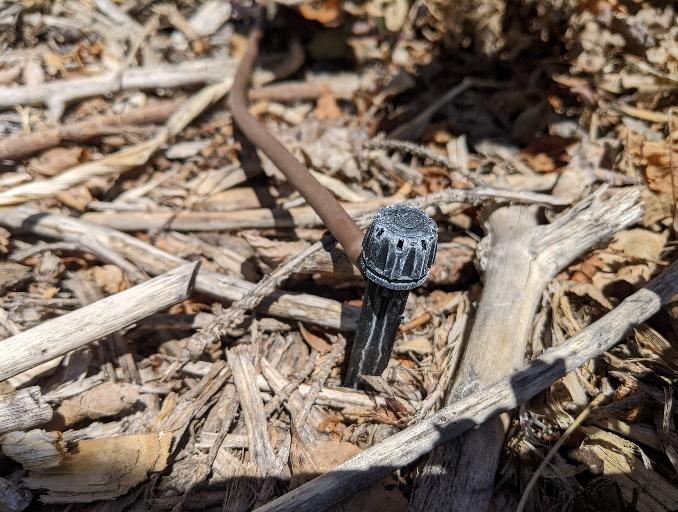
Watering – does your irrigation system need a check before plants get large and overgrow it? It’s always good to run a drip irrigation system to ensure there are no blowouts or large leaks, and that water is flowing freely. If you have overhead watering perhaps this is the year to plan to change over to drip irrigation, a far more efficient way to water!
Fertilizer/soil nutrition – January is a great month (if you have no snow and your ground isn’t too frozen) to take a soil sample from your vegetable garden and send it to a soil lab for testing. Soil labs can assess your soil nutrient load and soil type to help you with recommended amendments, and fertilizer needs for the year ahead.
Succession planting – many beginning gardeners eagerly plant their entire designated space for a crop in one go which is great for donation purposes if you want a large quantity but can be overwhelming and lead to not having enough of the crop for the rest of the season. Therefore, succession planting is a wonderful idea. Rather than planting all 10 rows of carrots you had planned out at once plant two rows now, and then two rows every 2-4 weeks. This ensure a continued small harvest through the growing season. Succession planting can be done with almost any crop, even short season zucchini (helps fight against powdery mildew issues). You can choose any length succession, even if it’s a spring and fall crop of beets, for example.
That’s it for this month, hopefully you have a great time planning and thinking about the amazing vegetable garden you’re going to grow in 2023 and happy new year! As always, if you have additional questions you can reach out to your local county extension office.
December 2022
Go beyond the garden center with seed catalogs
by Cassey Anderson, CSU Horticulture Agent in Adams County

Winter can be a peaceful and optimistic time for a gardener. You can take the chance to reflect on what went well in your garden last year and what you would like to improve. Perhaps there were some crops that failed that you want to try again, or something that did well but you didn’t get enough.
Websites are great for ordering seeds, but for inspiration and crop-specific information? Seed catalogues all the way for sure! So, you can set out your garden plan after careful perusal in December and January of your seed catalogues.
A run down

Most catalogues will organize alphabetically rather than by family, so tomatoes, peppers and potatoes will be in different places. Many will also give you a few pages at the beginning of the hot new types or options. Typically, vegetables take front and center in the catalogue and garden products and flower seeds can be found near the end. If the company provides live plants, they are also typically near the end.
My approach has always been to sit down and flip through all my favorites (and some of those that I end up getting but have never requested—you never know there may be something you MUST try!) before making any decisions. Note down with a marker the things that sound interesting and then narrow your choices down to a reasonable(ish) number. Aim to find enough that you’re trying some new varieties, not so many that your family objects to the size of your seed storage area.
Some Specifics
Some catalogues/companies are immensely useful for educating yourself on seed disease and pest resistance (looking at you Johnny’s) or other information about growing and planting. Others have gorgeous photography that gets your mouth watering (Baker/Rareseed). Some wow through artistic illustration (Botanical Interests), and some are focused on solid, reliable products (Territorial, Harris Seed, Park Seed, etc.). There are many focused and specific seed companies and catalogues as well such as Tomato Grower’s Supply Company or Maine Potato Lady. This list is by no means exhaustive and I’m always excited to hear about more and new seed companies/catalogues that folks have found to be useful, fun, or adventurous. If I neglected to add your favorite on the list, my apologies.
If you buy from a local seed company, you’re more likely to get varieties that do well in your area. If you’re buying from one that is outside of your area be sure to check that they fit in your growing season. As an example, I cannot grow German butterball potatoes at my house because their growing season is just too long for our season here in Colorado. This year, since we didn’t have a hard freeze until late October, I may have been OK, but it’s a big risk to take! To help with selection you may want to check out All America Selections: https://all-americaselections.org/. This is an organization that tests plant varieties (including vegetables!) around the nation to determine those that are best for a wide variety of areas.
One thing to note, many seed catalogues tout their use of GMO-free seeds. GMO seeds are only available for agricultural use. If you’re growing in a small farm or backyard setting it’s unlikely any seeds you purchase would be GMO.
Keeping Organized

Winter is a great time to sift through some of your existing seed collection, prior to ordering new seed material from those tempting new catalogues. It’s also a great time to organize the seeds you have so you know what you do or do not need to buy again.
Any seeds that are more than 7 or 8 years old should be taken out of rotation. Seed packets are required to have a packing year on them, so it’s usually simple to make the age determination. You can do a “germination test” if you want to try them out, especially if you’re a plant hoarder like me. This is a relatively simple process, take 5-10 seeds and place them in an airtight container (ziplock, Tupperware, mason jar etc.) with a wet paper towel. Check in frequently and if nothing has germinated after about two weeks it’s likely the seeds are too old. Most seeds have a good shelf life of around 1-6 years depending on type. Humid and excessively warm or cold conditions (above or below comfortable room temperature) can reduce the shelf life of a seed.
We’ll be back in January to discuss planning your garden. As always, if you have additional questions, please reach out to your local Extension office for more information.
November 2022
Facts vs Myths on the latest garden trends
by Cassey Anderson, CSU Horticulture Agent in Adams County
Should you plant a cover crop this winter? What’s hugelkultur about? Need help sorting through the latest trends in home gardening? Here’s a look at a few gardening facts vs myths, from hugelkultur to cover cropping. Some of these “hot” approaches have great scientific research behind them, some have good aspects, others may not live up to their hype. Let’s take a look!
Lasagna gardening

Lasagna gardening is a garden practice in which you layer “greens” and “browns” in lasagna-esque layers to provide a simple, no-till compost area. This is a great way to compost; it balances the two key components for compost (see our “Composting 101” article for details). However, although it’s a good system for creating compost, planting should not happen in the space until the composting process has been completed.
How long does Lasagna Gardening take? In some parts of America, or with the addition of a good amount of moisture for those of us who are in dry climates, this may not take very long, but left to its own devices it could take a season or longer. Patience is the name of the game for getting successful completed compost out of this process, but it can be a great way to start a new area. This system becomes complicated when combined into an active garden bed. Microbes that help break down the “browns” will consume available nitrogen to do so, which offsets the balance of Carbon and Nitrogen making plant growth challenging.
Sheet mulching with cardboard
Sheet mulching with cardboard is commonly touted as the best eco-friendly way to start a new garden area, smother weeds and as a general cure-all for problematic plants. When used appropriately it can work, but it’s not a long-term solution. Really, it’s best to mulch with 3-4” of mulch (wood chips, rock, straw or grass for veggie gardens etc.) with nothing underneath to allow for the best movement of air. If moisture is not present, the cardboard could potentially reduce gas exchange for plant roots. Unfortunately, there have not been very many studies on soil oxygen levels and sheet mulching, but if using this system be sure to keep an eye on your plants, if they start to look less than happy it may be time to pull some of the cardboard out.
Hugelkultur

Described as a centuries-old technique, the first references to hugelkultur actually begin in the 1960s. This garden technique creates a mound bed around a combination of large branches and twigs, grass sod, leaves, and compost in concentric layers. If you’ve read this far you may begin to see some similar issues as we have with the above two practices. Additionally, these systems require a substantial amount of moisture to ensure continued breakdown of the plant material. The carbon and nitrogen ratio may become problematic for plant growth. Anecdotally, I have not seen it be successful here in Colorado due to our dry climate. For a more in-depth look at hugelkultur see: https://pubs.extension.wsu.edu/hugelkultur-what-is-it-and-should-it-be-used-in-home-gardens
Cover Crops

Now we get into a garden practice that I embrace whole heartedly, (provided you’re not afraid of a little labor). Cover crops are a great way to improve soil in a vegetable garden in the off season. Typically, they are sown at the end of the growing season, although some gardeners may allow a bed to remain fallow with a cover crop for a season. They can be comprised of many different things including mustard, daikon, winter wheat, annual ryegrass, clover, cowpea, winter pea, vetch, white clover. Cover crops can help increase moisture retention, soil organic matter, soil nutrients (if you use a nitrogen fixing legume crop), reduce erosion risk, they can even break up compacted soil layers.
When planning what cover crop you want to use be aware that if you plant a perennial you must have a plan to kill it, this will depend on the crop, and can be laborious or you can use chemical control. However, if you plant an annual you could use the dead plant material as a mulch and plant your new vegetable crops directly into it the next year, this can cut down on weed issues.
Crop rotation

Crop rotation can be an asset to the home gardener. This is the practice of changing where you plant your vegetable families each season. For example, tomatoes, potatoes, peppers, eggplants and tomatillos are all solanaceous crops and should not be planted in the same area every year; it’s best to leave a year or more gap before planting in the same area again.
Rotating crops can help with soil nutrition. Planting corn in a bed the season after you’ve had peas or beans there could reduce your need to fertilize since both peas and beans are able to fix nitrogen from the are into a plant available form.
Crop rotation can be recommended at times for insect control, however its more effective for disease than insects since insect pests are mobile. If planting in containers you can simulate crop rotation by using new potting soil rather than re-using the soil year after year.
If you have more specific questions on any of these topics or need more specific assistance with your situation please contact your local county Extension office.
October 2022
Getting started with composting
by Cassey Anderson, CSU Horticulture Agent in Adams County

Composting in the garden
Is your late-season garden still going strong? Ready to throw in the towel? Either way, you may be starting to see quite a bit of plant debris building up. This month we’ll share some basics of getting composting in your yard down to a “T,” if not an exact science.
What is composting?
Composting, in its basic form, is a way of breaking down organic material into a long-lasting fertilizer that can help improve soil and provide a long-term nutrient source for plants. Most soils, particularly those used for vegetable gardens, benefit from at least 4-5% of the soil being organic material. This slowly releases nutrients such as nitrogen to help feed plants as they grow. Composting can be as complicated or as simple as you want to make it.
How can I get started composting?
The first thing you’ll want to consider is how you want to accomplish composting. If you have a yard you can create a pile, a container, or purchase numerous styles of compost bins. For indoors you may need to rely on additional help from something like a red wriggler worm.
What type of compost system should I use?
-287pk.png)
Composting can be as simple as piling everything into one big mound in your yard, but many people prefer to use a container of some sort. You can build your own or purchase one pre-made.
If you’ve got the space it can be good to use a 3-bin system. You can find plans to build these through many DIY website and Extension programs across the nation. In this system you add to a section for a season, then the next one in the following year, and by year three the first section is typically ready for use in the garden.
Black plastic compost bins can be great, but it’s often wise to steer clear of the spinning ones, especially in warm and dry climates as they can prove difficult to keep sufficiently moist. Additionally, when you’re continuing to add materials it can be hard to get a finished product.
There are also numerous fancy in-home systems that promise a finished product fast. These are still new and may be good in certain applications, but they are expensive.
What should I put into my compost bin?

So, you’ve figured out what type of composter you are, now for the details of how to be successful. Generally composting needs four different components. These are: brown material (high in carbon, dry, slow to break down), green material (high in nitrogen, moisture, quick to break down), water, and air.
Greens and Browns: Browns include leaves, straw, paper, sawdust, and woodchips. Greens include food scraps (even coffee grounds!), grass clippings, manure, garden debris and non-seedy weeds. Generally, you want at least 50% brown material and 50% green material, although different ratios abound on the internet. When possible, layer the two different types of material.
Water: When adding water to your system you want to aim for your pile to have the moisture of a wrung out sponge, not too wet and not too dry. In much of the nation this is easy to achieve, in drier climates, we may need to supplement water our systems if we want a quick composting process. Without all these your pile may be slow to decompose, could get smelly or be otherwise problematic.
Air: If you want your compost finished quickly, you will need to introduce oxygen into the system by rotating the pile frequently. The more often you turn it, the quicker it will decompose, and you could see a finished product in months. There are large screws you can purchase to use in turning your pile, but a garden fork or even shovel will work as well.
With good turning, moisture management, and a balanced addition of browns and greens it is possible to get a finished product within about 6-8 months, but due to winter it’s often reasonable to expect this season’s material to be ready for the following season.
No animal or dairy products! Try to avoid adding animal or dairy products in your home compost system, the primary reason being to reduce pest attraction and reduce potential pathogens getting into your garden system. Commercial compost systems can manage them because they get to a high enough temperature to kill off the pathogens that can develop.
Troubleshooting your compost project
There are several ways that composting can go wonky. Notice I did not say go wrong, because you can rectify almost any compost issue.
Stinky compost? If your pile is stinky you need to add more brown material (newspaper can work if you’re out of leaves, straw or wood), or to aerate the pile more effectively.
Compost not breaking down? If your pile isn’t breaking down or getting warm you may need more moisture, more air, or to add more green plant material.
Can I just bury my food scraps in the ground in my vegetable garden? Unfortunately, this is not a best practice. The material is unlikely to finish before the next growing season so you may be unearthing pieces when spring planting. Additionally, they can throw off nutrient balances in the soil.
Can I add diseased or woody plant materials to my compost? Home compost systems are typically small and are not able to get to high enough temperatures to kill pathogens in diseased plants or leaves. Best to leave these out, send them to a commercial facility, or put them into the trash. This is true for both viral and fungal issues in the plants. You also do not want to include any weedy plants that have gone to seed. Compost piles are an excellent nursery for new plants whether you want them or not!

How do I know when my compost is ready to use? If you can still see what the material originally was, your compost is not yet ready for use in the garden. It should no longer have a food, or rotten smell, should be dark brown and relatively moist. Use and enjoy!
If you have specific questions about composting, or about your fall garden be sure to contact your local Extension office.
September 2022
How to keep your garden growing as the weather cools
by Cassey Anderson, CSU Horticulture Agent in Adams County

Perhaps by now you are growing tired of your garden; the weeds, the endless zucchini, (or, in my case this year, cucumbers) and you’re ready for a frost to come and take it all away. However, if your goal is to contribute produce for as long as possible to your favorite local hunger relief organizations (hint! hint!) then season extension could be a great option to investigate.
There are varying levels of season extension depending on your commitment and your goals. They range from a sheet of plastic over your plants to a full greenhouse. We’ll go through what you’ll need for some basic season extension options.
Row Cover
Interested in learning more about Floating Row Covers? Check out this video from our partners at University of Colorado’s Grow & Give program!
The material typically lays directly over the crop and is made with woven or spun fabric. The use of row cover can increase temperatures by up to 15 degrees F during the day, but only offers 2-4 degrees of frost protection in spring, slightly more in fall with warmer soil temperatures. It’s important to keep the cover secured against the ground with rocks, sand bags, soil etc. especially if you’re in a windy area or if you suspect a particularly cool evening coming up.
Plastic mulch

This is a great way to warm the soil a little especially in the springtime. Plastic mulch does little to help with freezing air temperatures, so it is limited in its use for extending the season for warm season crops until air temperatures have warmed. Plastic mulch can give a jump start to germination for warm season crops at planting by warming the soil and speeding germination. Different colors of plastic mulch have different benefits. Clear plastic will warm the soil the most, but weeds are likely to grow in. Black plastic will warm the soil more slowly but is better at weed reduction. For soil cooling, white or reflective mulches are an option and research has shown they can reduce some insect pressure.
Low Tunnel with plastic
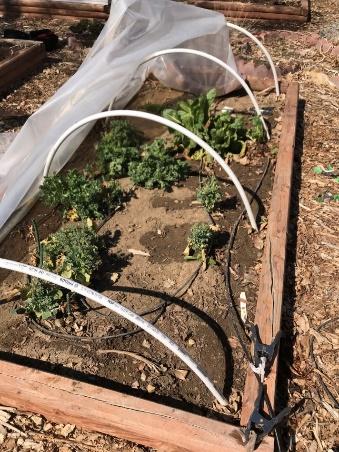
To build a low tunnel you need some type of support and UV resistant plastic. Generally low tunnels can be built over a standard garden bed whether it is a raised bed or in-ground. These are simple to install using rebar as ground support and PVC pipes bent over the garden bed. Fancier versions are out there if you look around. You can put spun row cover over your support structure but will get substantially better cold and frost protection with greenhouse plastic. Spun row cover is better at providing insect or sun protection. Avoid purchasing inexpensive sheet plastic like for painting projects unless you want to be cleaning up shreds of tiny plastic for the rest of your gardening career. Instead seek out plastic designed for greenhouses. On warm days it is good to have a way to vent the system even if that just means unclipping the plastic cover and pulling it up.
Cold Frame

A cold frame can be easily built DIY with wood and an old window. More permanent structures can be made with cinder blocks or bricks. Ideally, face the cold frame south or west to take advantage of the warmest part of the day. You can purchase temperature sensitive hinges that will open as the cold frame heats up, reducing the chances of cooking your plants if you forget to open them on a warm autumn day. These are effectively miniature greenhouses. Sometimes they are portable so you can move them around the garden if you so desire.
High tunnel
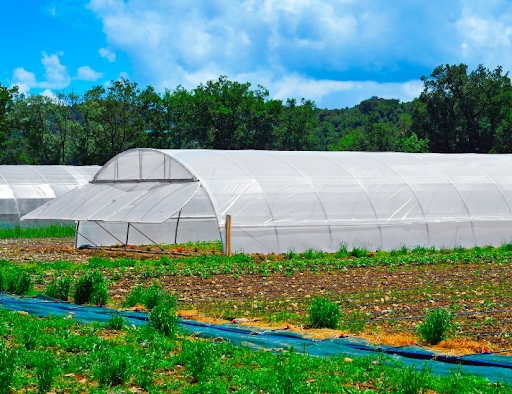
High tunnels are more involved than most homeowners want to go, they are a semi-permanent structure that give you a lot of growing area. Most are made using a UV resistant polyethylene, in one or two layers built over a metal frame. There are numerous kits available online. When planning it is important to have a way to vent the plastic during the day.
Greenhouse
The bigger the better for improved thermal mass which leads to less temperature fluctuation. Greenhouses are the most permanent season extension option, and with heat can be used to grow year-round. They are also the largest investment in both time and money. Contact your local extension office if you want to figure out an ideal greenhouse for your space.
Add some holiday cheer

If you’re not looking to build a heated greenhouse but you need to get your crops through that first one or two light freezes to get a few more harvests, you can supplement the heat by using incandescent “C4” Christmas light strands. The heat they put off will provide you with many degrees of frost protection. It does require access to power. You could also use something like a thermal cloth or numerous layers of plastic to achieve greater frost protection. A good seal against the ground is very important for successful frost protection, as the heat in the ground will radiate up, and can be lost if there are gaps.
If you have questions about any of these options for season extension, or any other yard and garden questions be sure to reach out to your local Extension office for more information.
August 2022
Golden rules for harvesting your garden bounty
by Cassey Anderson, CSU Horticulture Agent in Adams County
Where has the summer gone? If you’ve been lucky and persistent you should have ample vegetables in your garden by now, both for your own uses and plenty more to donate. Today we’ll talk about good harvest practices for some garden vegetables and some of the best things to consider for harvesting successful crops to donate.
Three Golden Rules
The three golden rules of vegetable harvesting are:
- Keep it cool
- Keep it wet (when appropriate)
- Handle with care
With almost any crop, harvesting is best done in the cooler parts of the day. Many crops can be harvested and placed directly into a container of cool water, or at least placed out of the sun if you’re continuing harvest. Using a sharp knife, scissors etc. is a better choice for harvesting than tearing off the main plant, it reduces stress, reduces the chances for damage and makes for a cleaner product.

Harvesting for donation
When harvesting crops you intend to donate, it’s best to follow some basic food safety guidelines. Be sure to wash your hands with soap and water, avoid touching your face, and if you’re ill, wait until you feel better before you harvest for the purpose of donation. As you harvest your produce, place directly into a container that has been washed each time before use. Do not use this container for other purposes like holding tools or compost. Clean your produce in a clean location with potable water. Once you have harvested and cleaned your produce be sure to use clean bins or boxes lined with chemical-free plastic bags (do not reuse grocery bags) but do not seal the bags. Keep harvested produce (except for tomatoes) cool in the refrigerator to store or before donation.
Produce should not be chopped or cut, this will reduce the shelf life (an exception being removing the tops off root crops or dying leaves if necessary). Try to time your harvest so you can deliver as soon as possible. Only donate the material you would want to consume.
Tips for Harvesting Popular Crops
Beans – pole and bush fresh beans. Harvest once the pods have grown round, but before the beans have begun to swell, the flavor decreases after beans mature in size. Clip off the vine rather than pulling to avoid damaging the main vine. For pole beans, ensure you harvest regularly (several times a week) to keep production high. For bush beans, the plants will throw 2-3 main crops before being finished. You can succession sow if you want a continued harvest.

Beans – dry beans. Allow the beans to fully mature and dry before storing, the pods will dry before the beans so check for any softness remaining in the bean before storing. if frost is threatening you can harvest the plant and hang to dry in a cool, dry space.

Root crops – Carrots, Beets, Turnips etc. Loosen the soil around the plant and pull when at desired maturity. Beets can be allowed to grow up to 2”, much larger and flavor may diminish. Smaller roots may be sweeter. Turnips should be grown according to the seed package, larger storage types vs small sauté varieties. Carrots can be left in the ground for winter harvests with a thick layer of mulch. Remove greens before storing to ensure longer storage, as the leaves will pull nutrients from the root crop.
Peppers – shade if the plants get late afternoon sun. Harvest when the pepper reaches mature size. It is possible to harvest when mature in size but not color and this can be OK for some crops (jalapeno) but not preferred for others (shishito). It’s important to clip the fruit when it’s cool and keep out of the sun to avoid sun scald damage especially for thinner skinned peppers.

Tomatoes – Harvest when the fruit colors, dark green tomatoes are immature and can be used as green tomatoes. If there is a color at the blossom end it’s known as a “breaker” and will successfully ripen on the counter. For green varieties often a small pink blush may appear on the base. If you’re growing more heirloom varieties pick slightly early from fully ripe to prevent mushiness. For more exotic coloring check images of the mature fruit and do frequent taste tests!
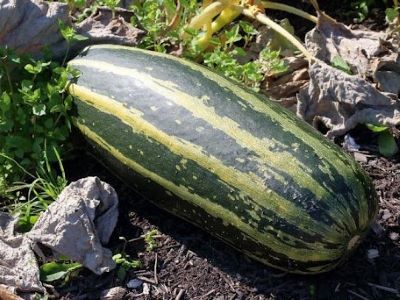
Summer Squash – these diverse garden providers can be harvested at any size, but generally harvest when 1-1/5” in diameter or 6-10” long and before seeds develop fully. If smaller harvests are desired, they are great for pickling. If a giant like the one pictured here shows up you can roast it. Clip from plant instead of pulling. If desperate to harvest your bounty of summer squash you can twist the fruit to release from the plant, but clipping is better.

Winter Squash – This can apply to pumpkins or any variety of storage winter squash. It’s best to wait until the fruit has gained a mature size, then reduce watering over a few weeks. Pluck any existing blossoms from the plant to pump energy into the existing fruit (the blooms are tasty too!). Harvest when the skin cannot be dented with a fingertip and the stem begins to dry or the rind develops a color. Cure in a warm, dry location out of the sun for at least a week or two then put into storage for up to 6 months.
July 2022
Worst weeds and how to stop them
by Cassey Anderson, CSU Horticulture Agent in Adams County
It’s July. If all has gone well you’ve got some flourishing plants, perhaps you’ve had numerous harvests of lettuce, beets, spinach, peas and other cool season crops. Perhaps if you’re very lucky some of your warm season crops are beginning to set fruit (peppers and tomatoes?). However, although your garden is thriving something else may be growing well in your garden beds too: weeds!
Weeds are, by definition, a plant in a place we do not want them. So, an errant tree seedling (I get these all the time) in your vegetable bed is a weed even if you’d like it somewhere else in your yard. But I’m not here to talk about less common weeds like trees, rather let’s look at the top six heavy hitter weeds you may commonly see in your vegetable beds. It could be tempting to just leave them be, but weeds often outgrow desirable crops, taking valuable nutrients and water from our vegetable plants, so management is important.
First, let’s define a few things. The first thing to know about your weeds is their life cycle. Are they annual or perennial? This will change how you manage them. Perennial weeds must be eliminated through persistence. Perennials have large taproots or large root systems, and some may reproduce via their roots. This means that if you let them grow, they can refill the energy storage in their root system undoing your hard work. Annuals grow from seed each year, so if you can prevent the seeds from germinating (pre-emergent, mulch), or remove them when very young (stirrup hoe, pulling) then you prevent them from going to flower/seed.
For manual removal of weeds, you’ll want several tools: your hands (or even better, a willing helper!), gloves, a soil knife or digger (I use a Hori Hori and adore it), and a stirrup hoe. For perennial weeds you want to remove as much of the root as possible. Annual weeds can be removed successfully if only some of the root has gone, although too little may mean it can grow back.

There are many options for chemical control. If you want organic control you can use boiling water, or burn down agents such as clove oil, herbicidal vinegar, citrus oils etc. Be aware these won’t kill the whole plant and likely will need repeated applications once it regrows. Conventional systemic herbicides applied carefully can also get you good weed control. Focused treatment is always better than broadcast treatment so be sure to apply only to the weed. Contact your local Extension office for specific recommendations for your types of weeds.
Now let’s get into some specifics. I’m going to provide the common name and scientific names so you can find more detailed information than I have time for here.
PERENNIALS:
Bindweed (Convolvulus arvensisi)

This is one of the most persistent weeds in the home garden. It’s not easy to eradicate. Remove it when young, scout numerous times a week and remove as much of the root system as possible. Herbicides in conjunction with pulling may be the best bet but control can take up to 3 years even with the use of herbicides. Root systems can be long (30’+) so do not let the plant grow and feed back into the root system. Try to pull before the plant flowers and produces seed (at the stage shown here is great), as bindweed seeds can live for up to 50 years.
Canada Thistle (Cirsium arvense)
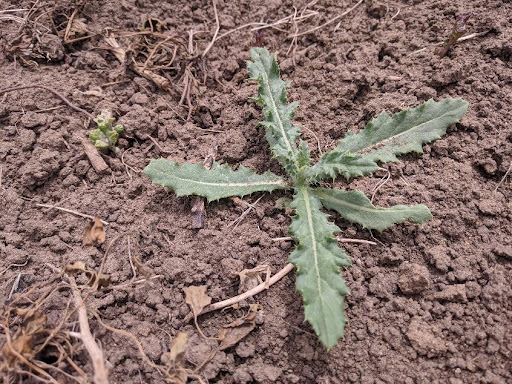
Another perennial with deep, long lived root systems. Can grow rapidly and it is difficult to eradicate except through persistence. Remove when you see leaves emerging. If using herbicides, treat when young (as in the picture). Once they get more mature, they don’t take the pesticide up as well and control will be limited. Be sure to wear some tough gloves if removing manually as they are spiny and can poke through garden gloves.
Dandelion (Taraxacum officinale)

Commonly seen as both a garden friend and foe, the dandelion is a taprooted perennial. This means it has a root that looks like a carrot. Removing only part of the root will not eliminate the plant. Be sure to remove as much of the root as possible to get the best control. These are more common on the edges of the vegetable garden, and mulch can reduce the germination of new plants. If you’d like to keep a few as an early food source for pollinators, you can remove the flowers once they’ve closed and before they develop seed heads.
ANNUALS:
Purslane (Portulaca oleracea)

Purslane is another weed that is friend or foe depending on your definition. It can produce up to 250,000 seeds that remain viable for up to ten years. Generally, this one is at least easy to control, pull before it flowers. You can use it as a tart addition to your summer salads. Because it is an annual it has a small root system and is easy to pull out by hand or with something like a stirrup hoe.
Lambsquarters (Chenopodium album)

Lambsquarters are another that are weedy and common but can also be an addition to your spring garden salad if found early (before flowering). Control is going to be most effective when young as the root systems can get large and dense once more mature. Scout frequently. If an entire bed is overtaken with lambsquarters some herbicide control could be warranted. It’s easy to control, we need at least one like that!
Pigweeds (redroot or prostrate are common) (Amaranthus spp.)
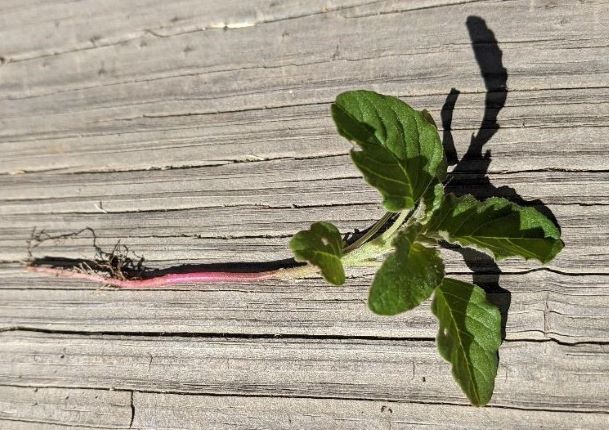
Pigweeds are common but often overlooked in the vegetable garden when immature but can become many feet tall if allowed to grow. Pull young and they won’t come back. If they get large try to pull or remove before they develop seeds as seeds are long lasting. These are related to amaranth but don’t have the tasty qualities of the plant we grow for harvest.
HONORABLE MENTION:
Grasses can be annual or perennial depending on type. If you use hay as a mulch this is a common annual weed. If you have turf creeping into your vegetable garden from your lawn, it’s likely perennial. Removing as you see growth and mulching for annual grasses are going to be your best bets for success in control. If your lawn tries to invade frequently you may consider a buffer or barrier. You can bury a metal “wall” to slow the grass or put in a wide strip of mulch at least 3-4” deep to keep the grass at bay.
Whew! You made it through our whirlwind tour. There are many more weeds that we just didn’t have time to cover and so, as always, contact your local county Extension office if you have further questions.
June 2022
June Gardening Tips from CSU Extension
by Cassey Anderson, Adams County CSU Extension
Watering, succession planting, planning the Fall garden
There are many ways to successfully water a vegetable garden; overhead, drip irrigation, flood, hand watering. They all have benefits, although there are drawbacks for each as well, it’s up to your own space, the conditions and requirements of your garden space to determine what will work best for you. The basic principles of irrigation are that you want between 1-2” of water down on the crops and going 6-8” deep in the soil each week. Higher temperatures, dryer weather will mean a greater need for water, and alternately cool temperatures or precipitation will mean you can ease off the watering. It’s always good to test your soil before watering. Our fingers are excellent tools for determining soil moisture: put your finger in the soil up to your first knuckle and feel if the soil is moist underneath. If it is, you can likely hold back unless you’re seeing drooping from heat/dry. Be sure to let the soil dry out a little between irrigation as most vegetables don’t appreciate wet roots!
OVERHEAD IRRIGATION
Overhead pros: this is one of the easiest, and lowest cost ways to water a garden, a hose and a sprinkler head that you can move around the space. Different types of sprinkler heads put water down differently. Fan sprinklers can cover a lot of area with a gentle large droplet type. Spot or circle sprinklers can put a lot of water down in a short period. In-ground systems can cover thoroughly if you’re converting a turf area into a vegetable garden. Overhead sprinklers can be especially effective in any garden system in helping to guarantee good seed germination and emergence. With an overhead system it can be easy to determine how much water you’re putting down (using several straight sided containers such as a tuna tin).

Overhead cons: overhead can be wasteful, as much of the water can be lost to evaporation particularly in drier climates, or on windy days. Overhead irrigation can also promote disease in a plant. When the leaves and stems are regularly wet disease pathogens such as fungus, virus or bacteria can reproduce more effectively. Additionally, as plants get larger leaves and stems may grow up in front of the sprinklers potentially blocking uniform water movement to the ground.
DRIP IRRIGATION
Drip irrigation pros: Drip irrigation is the most efficient way to get water to your plants. There are many different options for designing a drip irrigation system. Most nurseries and big box stores will stock plenty of drip irrigation supplies that put down water in the amounts you will need. There are some key components to drip irrigation namely: backflow preventer, pressure reducer and filter at the beginning of the system. After that you will typically use ½” black or brown tubing which can feed ¼” drip tubes. The ¼” line can either have emitters built in at various spacings or can have emitters added on. If you ever did Lego or Kinex as a kid (or an adult), you, too can build your own drip system! For more details see https://youtu.be/H9nqeh29oHk.
Drip irrigation cons: While much more efficient, drip is not a drop and go option, emitters need to be checked and maintained throughout the season and in between seasons. If you have hard water the emitters can get clogged as well. The system also will cost some money to get established. The components are plastic but are built with food-grade materials. They can be susceptible to UV damage. The solid plastic tubing will have more longevity than soaker hose lines.
FLOOD IRRIGATION
Flood irrigation: much less common, but a very good way to get a lot of water in a space in a short amount of time. This is the least efficient system available for vegetable gardens, but common in some areas in the west with irrigation systems established. It can be made more efficient because the runoff water can be re-used. The ground will need to have a regular downward slope.
HAND IRRIGATION
Hand Irrigation: hand irrigation is great if you have a very small area, and/or if you’re around a lot. It’s more effective for container gardening than for larger garden spaces. You need to ensure you’re really wetting the entire soil to at least a 6-8” depth, which can take a while if you’re using a watering can or even a hose with a sprayer. It’s a great option for getting seedlings established in their first 1-3 days after transplant.
Finally, I wanted to discuss two of the best options for a successful full-season vegetable garden: succession planting and planting for a fall garden.
SUCCESSION PLANTING
Succession planting is a great way to maximize the duration of harvest. It involves planting the same crop over the course of many weeks in the same space. So instead of planting 5 rows of lettuce that will all mature at the same time, you can plant one row every two weeks and get a longer season of harvest (plus not get overwhelmed with produce!). Don’t forget to make a plan to Donate! Plant two rows each time, and harvest one for your household needs, one to donate.
FALL PLANNING
Fall gardens are also an excellent way to extend your harvest, and another form of succession planting. Many of our spring crops do well as a fall crop as well. Leafy greens, carrots, beets, peas etc. can all be planted in early to mid-July in most areas for a successful harvest in the fall before hard frosts begin. June is a great month to begin planning, ordering seeds and outlying your garden space. Because July is a very warm month you may need to take extra care with the seedlings to ensure good germination. Preventing soil crusting from drying out is very important for successful germination. This can be achieved with row cover, a thin layer of sand (prevents crusting), or regular light watering.
As always, if you have specific questions for your garden space, reach out to your local Extension office!
May 2022
May Gardening Tips from CSU Extension
by Cassey Anderson, Adams County CSU Extension
Vegetable Gardening in small spaces? Even if you don’t have a yard or outdoor space? Yes you can!
There are so many ways you can get fresh vegetables, and for many you don’t even need all that much space. Growing can take place in any number of ways: small plots or containers both work. We’ll have a brief overview of growing indoors, on the porch or patio, in a small backyard in containers, and in ground planting in tight spaces.
For any growing system you’ll need some material to grow in, a container to hold it, and access to water. You can grow nearly anything in a small space with enough willpower, but some things do grow better than others. Many seed companies have spent a lot of time and effort in the past few years to develop seed and plant varieties that are compact, that produce without taking up a lot of space. When looking for smaller options, seek out seeds or plants with names that include mini, micro, patio, petite, baby, dwarf, pixie etc. So, with that let’s dive into our different options!
Indoors only!
If you have no outdoor space and no porch or patio you’re not out of luck. You can grow hydroponically with either a DIY system or a purchased hydroponic system. DIY systems can be inexpensive ($50-100) but a little more finicky to get started with. Purchased hydroponic kits tend to be more expensive ($250-1000) but come with support from the company, fertilizer schedules and guidelines and are fairly plug and play. If you don’t want to mess with hydroponics you can grow microgreens or other greens (lettuce, kale, spinach etc.) in an area with some natural light, and with supplemental LED lights to ensure good growth.
Porch or patio pots
When growing on the porch or patio you’ll be seeking out medium sized containers. Generally, peppers and tomatoes need at minimum a one or two gallon pot (10-12” diameter) but will do better in something over 5 gallons (big box store 5 gallon buckets can work great if drainage is provided). You want to find a well-draining material to plant in such as potting soil. Avoid garden soil as it is designed to be dug into the ground. Many vegetables can thrive in a small container including peppers, chard, lettuce, herbs, tomatoes, beans, cucumbers, squash, root vegetables etc. It’s important to take into consideration the mature size of the plant and use the largest container you can fit for it. Root crops for example may not require a lot of width, but will require depth. Indeterminate tomatoes will need a much larger container that determinate tomatoes.
No-digging!
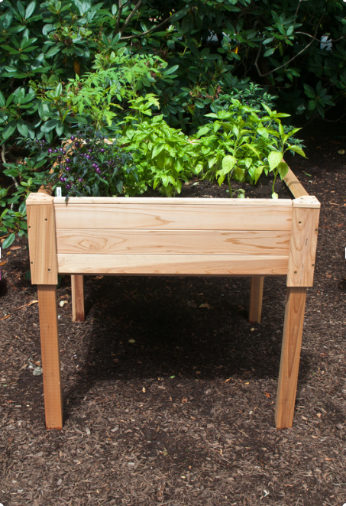
If you have a small backyard but cannot dig into it then you can get larger containers. 15 gallon fabric pots are amazing for planting many desirable crops such as peppers, tomatoes, potatoes etc. You can also build raised containers that would allow gardening while seated in a chair, a more accessible way to reach your produce. Do be aware that raised containers, as well as containers in general, may dry out more quickly so regular irrigation is important.
Planning how you will water your plants is important, drip irrigation is relatively inexpensive and can be automated if you’re not consistently home. However, if you only have a few containers you may choose to water manually. Ensure the plants are getting enough water for some to run out the bottom each watering cycle and let the surface get a little dry before you water again.
Community gardens
Our final level of small space gardening is if you have a small plot in a community garden, or perhaps a small space in your yard. If you’ve not got a lot of space to work with you can grow vertically, and you can also practice block style planting. Vertical growing can be as simple as providing a vertical support for a bean plant to climb, or you can build trellis systems for vine crops such as cucumber, melon, or even pumpkins! If you are growing larger crops vertically you may need to create a support structure of some type (see the mesh on the squash image at right. Block style planting is a way to plant crops without as much space in between rows. So instead of rows of lettuce that are 6” apart in the row with 10” of space in between rows, you would plant the lettuce with 6” spacing within the block. This has many benefits such as keeping the soil cooler through shading, more efficient use of space, and easier harvests. See the following link for some great details on block style planting: https://cmg.extension.colostate.edu/Gardennotes/713.pdf
Hopefully this has inspired you to start your own small scale garden! If you have specific questions be sure to reach out to your local county Extension office.
April 2022
April Gardening Tips from CSU Extension
by Cassey Anderson, Adams County CSU Extension
April is the month when many gardeners are really getting things going.
Perhaps you’ve planted some peas or kale in the vegetable garden already, perhaps you’re just getting things underway. Regardless, April is a busy month. You can plant your cool season crops: radish, spinach, lettuce, green onions etc. You can start warm season crops indoors: cucumbers, melons, squash, pumpkins etc.
What’s the difference between a warm season crop and a cool season crop?
Mostly it’s in the temperatures they’re willing to tolerate, and those that they will grow well in. Cool season crops can tolerate cold temperatures, and some can even tolerate light freezes (defined as anything between 28 F and 32 F). These crops are also typically done with their season by the time we really warm up in July. Many of these crops have produced their final fruit or bolted, i.e. gone to seed, once daytime temperatures go up into the high 80s or 90s.
One thing that can be a little surprising for many of our cool season crops is that although they like to grow in cool temperatures, they germinate better and more quickly with warm temperatures. You can pre-germinate many of the cool season crops: peas, lettuce, kale, onions etc. Soak a paper towel and put it in a ziplock bag or other sealable container, place the seeds in with it for 12-24 hours at room temperature. You can get them warmer, many crops like to germinate between 70 and 80 F. See this Colorado Master Gardener Garden Note for specific crop temperatures:
https://cmg.extension.colostate.edu/Gardennotes/720.pdf.
You can get your perennial garden going as well: asparagus, rhubarb etc. are good to get started in mid- to late-April. Perennial crops may take a few years to get their feet under them before harvest, but you can subsequently enjoy even decades of low-effort production.
Planting asparagus
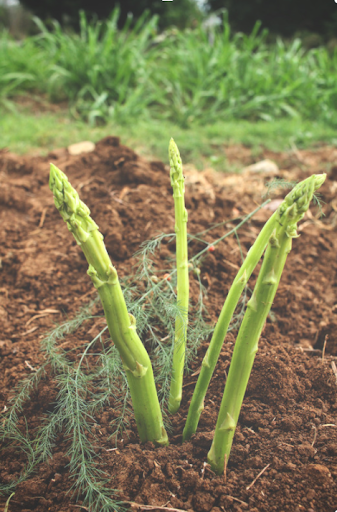
Asparagus can produce for over 15 years in a vegetable garden. You can start from seed but buying crowns will give you some time advantage. Choose a sunny, well-drained area, preferably somewhere not prone to freezes in your yard (not low-lying for example). Amend the soil with a well-rotted compost if needed. Plant crowns deeply in a 6-12” trench, cover lightly and bury as the crowns grow up. Place crowns “head to toe”, root tip to bud tip, typically with the crowns about 12” apart. Water regularly so the crowns do not dry out. Plant seeds about 1” deep, they may take up to 3 weeks to germinate. Mulch well for winter. Do not harvest for the first 1-3 years (sooner for crowns, longer for seeds), or until you begin to see numerous spears poking up. In the first year you should harvest for about two weeks and let the remaining spears turn into ferns that will feed back into the plant overall. In subsequent years you can harvest for 4-6 weeks, usually into mid-June or early July.
If you have specific questions be sure to reach out to your local county Extension office.
March 2022
March Gardening Tips from CSU Extension
by Cassey Anderson, Adams County CSU Extension
March is the start of many gardeners’ seasons, particularly if you’re starting a new garden, improving it, starting seeds, or even planting early season crops. Regardless of how involved you are in the garden; March is a great time to make plans for the season coming up.
If you’ve had a soil test and your nutrients and/or organic levels are below 3-5% it may be prudent to amend with compost. The type of compost will influence your choice for amendment type. A manure-based compost will be higher in nutrients such as nitrogen, phosphorous, potassium etc. These, in excess in a soil, are also called salts. Plant-based compost will be lower in salts. You can amend more of the plant-based composts than the manure-based, levels will depend on need. See the chart below for approximate amendment values, reduce if your soil test shows higher salts or organic material. Incorporate compost into at least the top 6-8” of the soil, or crack into the soil with a broadfork if practicing limited tilling in your garden. If your organic material levels are over 5% it’s ok and even encouraged to take a year (or more!) off from amending your beds. More gardens are likely over-amended than under-amended.
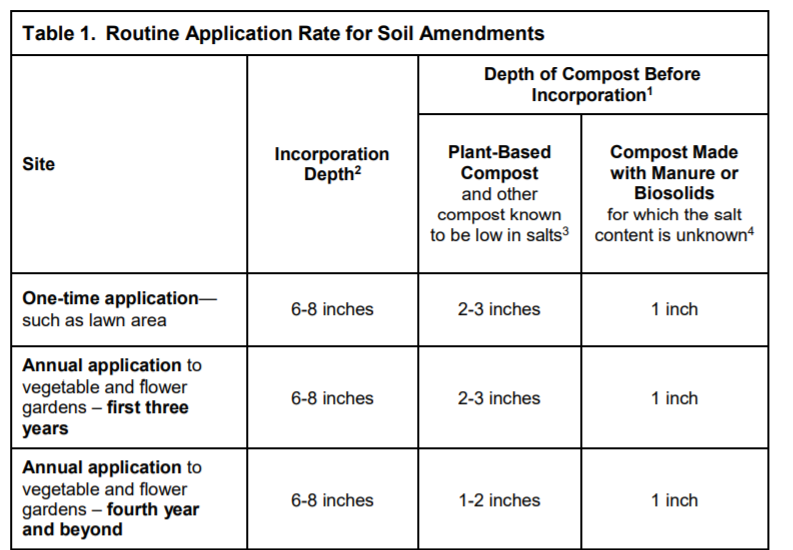
March is the ideal month to get your seed starting setup put together. Seed starting can be very basic (seed starting soil, water, container) or more elaborate for a better guarantee of success. To ensure the best start for your seeds you should seek out: sterile seed starting soil, good quality seeds, a heat mat, supplemental light, and containers that can help increase ambient humidity. Most seeds that can be started early will tell you how early to start. For example, tomatoes need to be started 6-8 weeks before you plan to transplant in the soil. Be aware not to start too early as larger seedlings can be harder to transplant.
Sterile media – important to eliminate seedling death from damping off, a common fungal pathogen present in soil
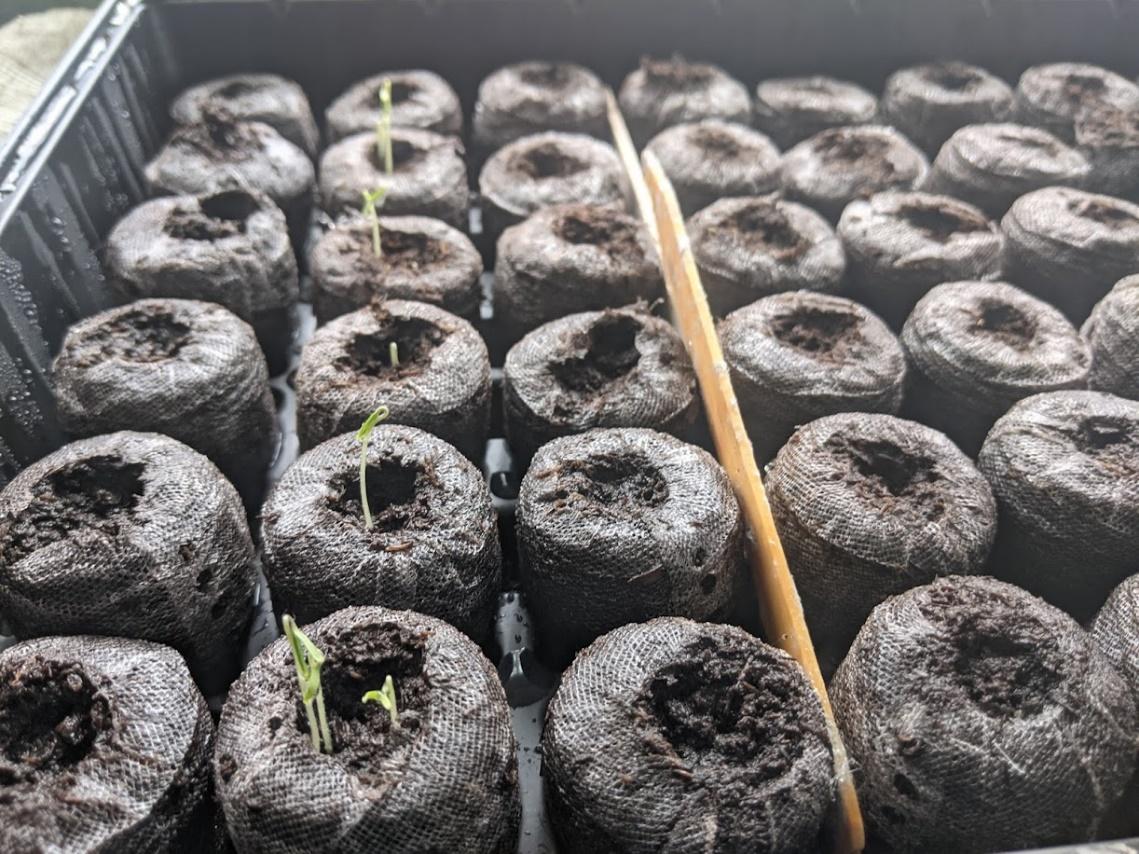
Quality seeds – can be saved from good local sources (your local seed library) or purchased from commercial retailers. Be aware that there are currently no GMO products available to home sales, so don’t worry about sourcing GMO free seed, they all are.
Heat mat – many seeds germinate OK at room temperature, but much better with an extra nudge. Peppers, for example, can take up to 4 weeks to germinate at low temperatures but may be as few as 2 weeks at 75-80 degrees F.

Supplemental light – LED lights reign supreme now for successful supplemental light, but if a new light is beyond your budget you can combine a cool and warm ballast in a traditional shop light. Just be sure to keep the light close to your young plants.
Seed starting containers – can be repurposed or purchased. Low and flat containers are often the most ideal, especially those that have a lid or top. Repurposed salad bins can be a great way to go, or seed starting flats. Be sure to have some way to check moisture at the bottom or encourage drainage (see the algal growth that can happen with a little too much moisture below!).
Timer – timers can ensure that you have good amounts of light (14-16 hours is great!) without having to remember to turn lights on/off. Heat mats should stay on 24 hours.
Check out seed starting on Grow & Give for a more in-depth discussion: https://growgive.extension.colostate.edu/grow/general-gardening-info/
If you have specific questions be sure to reach out to your local county Extension office.